


Introduction
In this guide, we will create:
- An ERC-721 NFT Drop smart contract with lazy minted NFTs users can mint
- Your own ERC-20 token smart contract
- An NFT Staking Smart Contract where users can stake their NFTs, and earn tokens for doing so!
By the end, we'll have a full stack web application where users can see which NFTs they own, stake them onto the smart contract, and claim their rewards!
Let's do this!
What We'll Build
You can check out a demo of the finished product below:
nft-staking-contract.thirdweb-example.com
Source Code
You can access the full source code from here:
Let's get started!
Creating the NFT Drop Smart Contract
Our objective with the NFT Drop is to upload all of our NFT metadata, and then allow users to come to our website and mint a random NFT from our collection.
We can do this using thirdweb's Pre-built NFT Drop Contract!
thirdweb's drop contracts lazy mint your NFTs and makes them available to be claimed by your users.
That's exactly what we need! Alright, let's go ahead and create our NFT Drop!
Creating the NFT Drop Contract
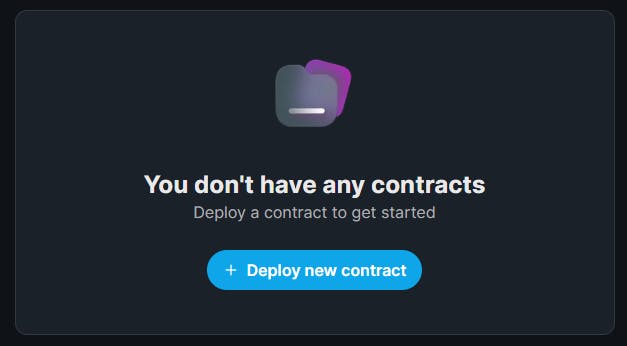
Head to the thirdweb dashboard and connect your wallet.
Then click on Deploy New Contract.
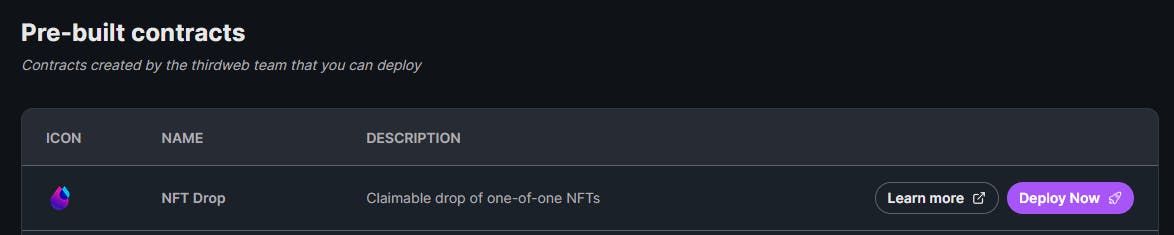
What we want is the NFT Drop contract, lets click Deploy Now on this one!
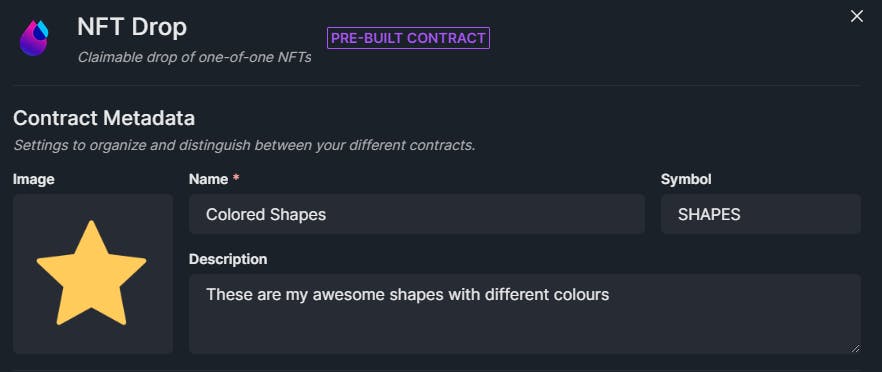
You can configure the Name, Symbol, Description, Image, and Royalty information in the settings before you deploy your NFT Drop.
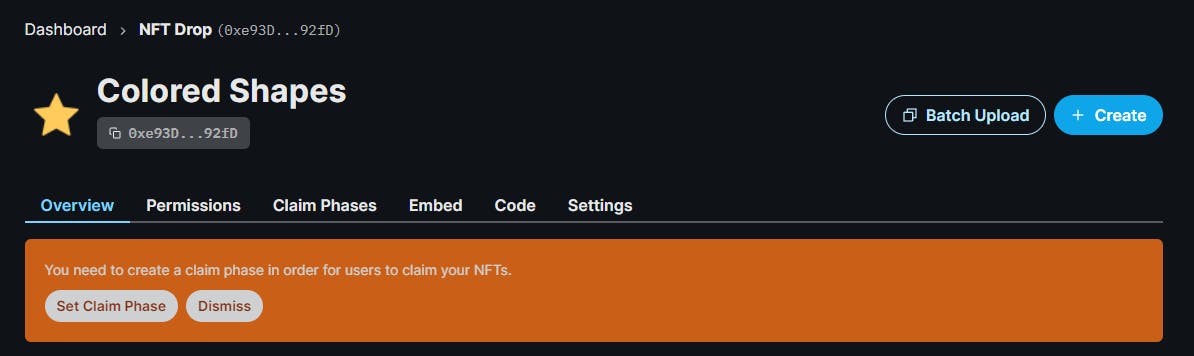
I'll call my NFT Drop Colored Shapes and stick with the default values for the rest of the fields, but feel free to go wild and configure this to your liking!
Once you're happy, let's deploy this NFT Drop onto the Mumbai (MATIC) Test network.

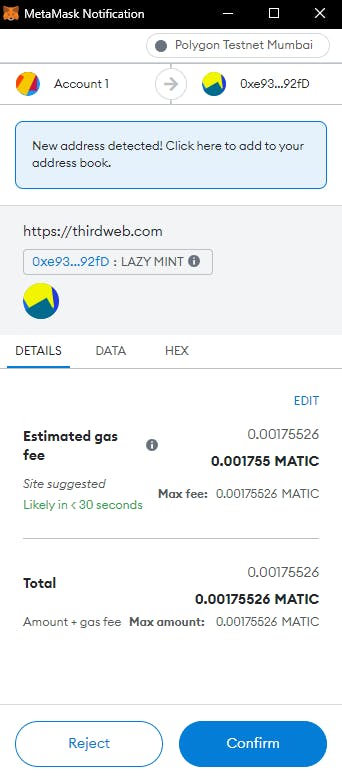
This will prompt you to accept a transaction in MetaMask (or whatever wallet you connected with), and deploy your smart contract onto the Mumbai Test network!
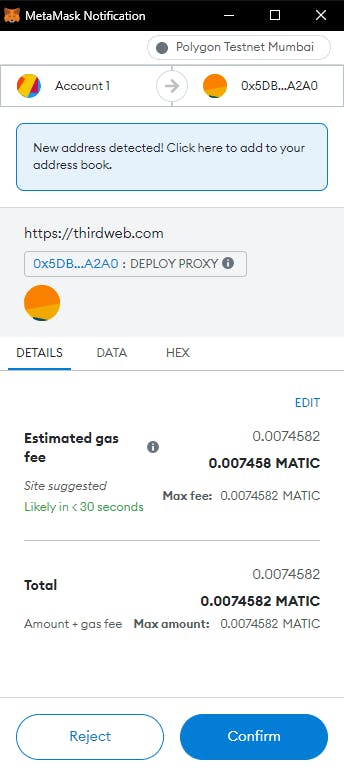
You might notice that the MetaMask transaction is requesting we Deploy Proxy. What on earth does that mean? Let's quickly explore what happens when we deploy a pre-built contract on thirdweb.
Pre-built contracts and deploying a proxy
thirdweb v2 introduced Proxy Contracts. For a full breakdown, you can check out the documentation on how thirdweb pre-built contracts work.
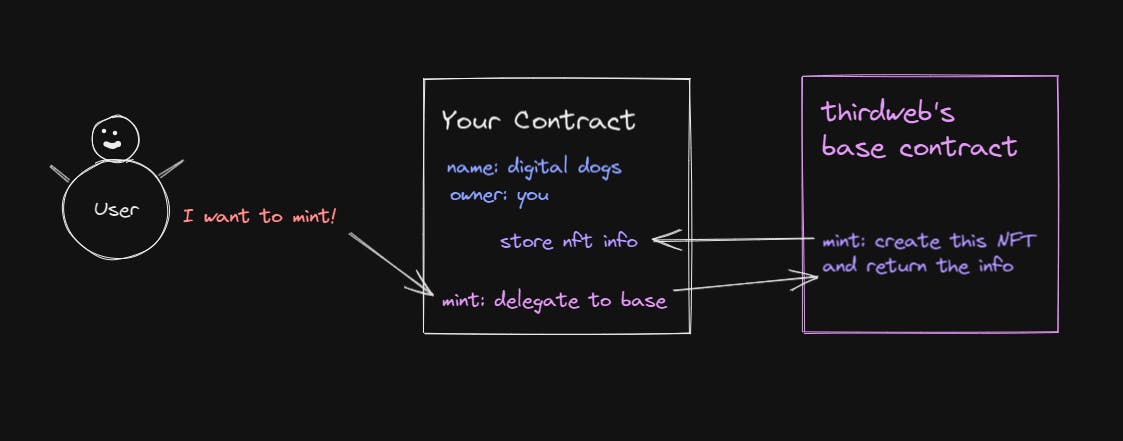
In a nutshell, the bulk of the smart contract logic has been created and deployed by thirdweb; you're just deploying a Proxy Contract, that stores information specific to YOUR smart contract. Such as the name, description, symbol, owner, and royalty configuration.
Since all of the NFT Contracts deployed on thirdweb have the same logic for things like minting and burning NFTs, we can simply delegate these function calls to the thirdweb base contracts; where the "real" logic lives.
This way, it is around 10 times cheaper to deploy our smart contracts, since we deploy a lot less code, and let the thirdweb base contracts handle all the logic for us.
Here is a simple diagram to explain how this works:
Alright, now we know what we're deploying, lets's Confirm that transaction and continue!
Setting Claim Phases
Claim Phases are conditions we can configure that define when and how users can claim NFTs from our collection.
A popular claim phase pattern is to have one claim phase where allow-listed wallets can claim, then another phase where any wallet can claim.
From the thirdweb dashboard, let's click Set Claim Phase and configure a simple claim phase where anyone can mint/claim our NFTs.
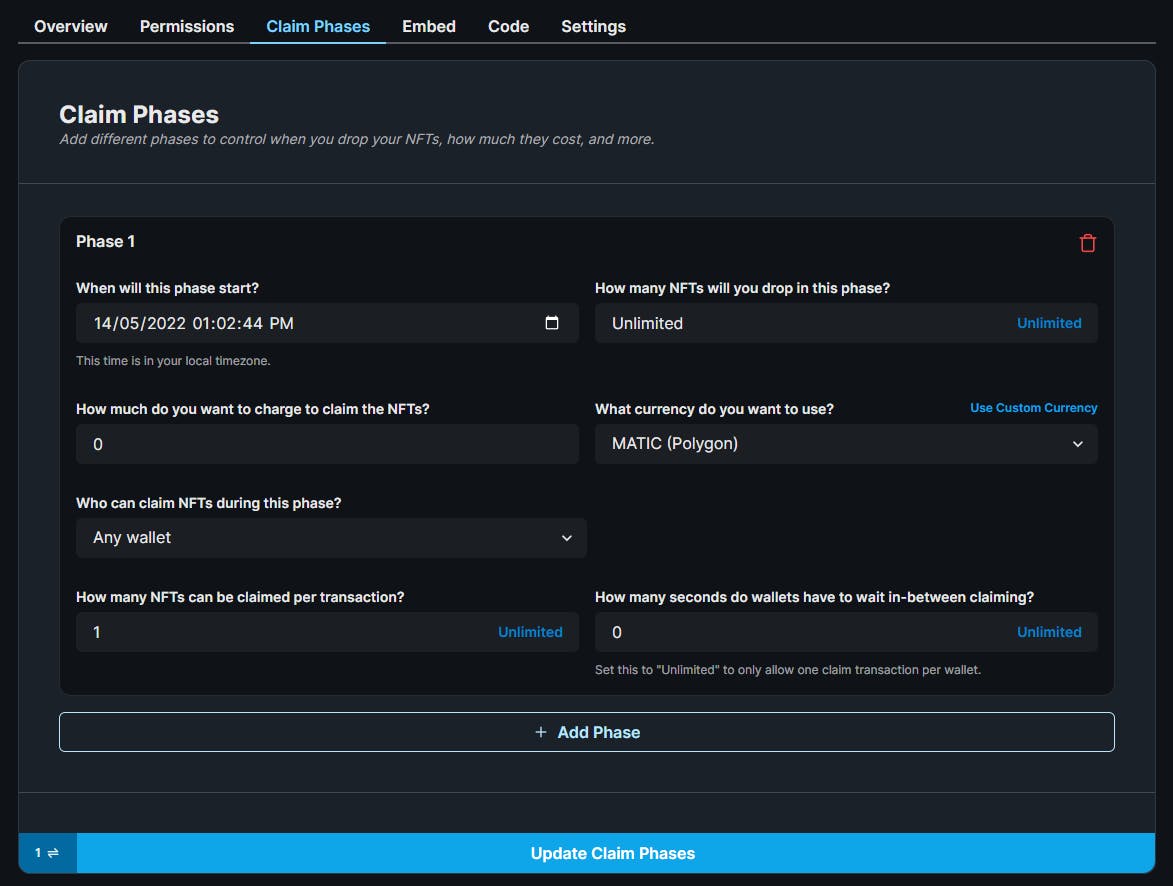
Click on Add Phase, and configure it to your liking!
I'm going to change the How many NFTs can be claimed per transaction? to be 1, and accept the default values for the other fields.
Once you're happy with your claim phase(s), click Update Claim Phases
Lazy Minting NFTs
Awesome, now we have a claim phase set up, users can start claiming NFTs from our collection! So let's create those NFTs now.
thirdweb's Drop contracts Lazy Mint your NFTs. That means the user who claims the NFT is the one who actually does the minting of the NFT they claim.
When you add NFTs to your drop contract, they are not minted at this point. You prepare everything for your users so that they can mint the NFT(s). This means the user who claims the NFT is the one who mints it, and it is minted into their wallet. By default, the user is the one who pays the gas fees.
So now all we need to do is upload the metadata for our NFTs, such as the images, names, and descriptions of each NFT.
How to Batch Upload NFT Metadata
If you don't already have NFTs that you want to upload, you can use thirdweb's example files to create a dummy NFT Collection. You can access either of those via the links below:
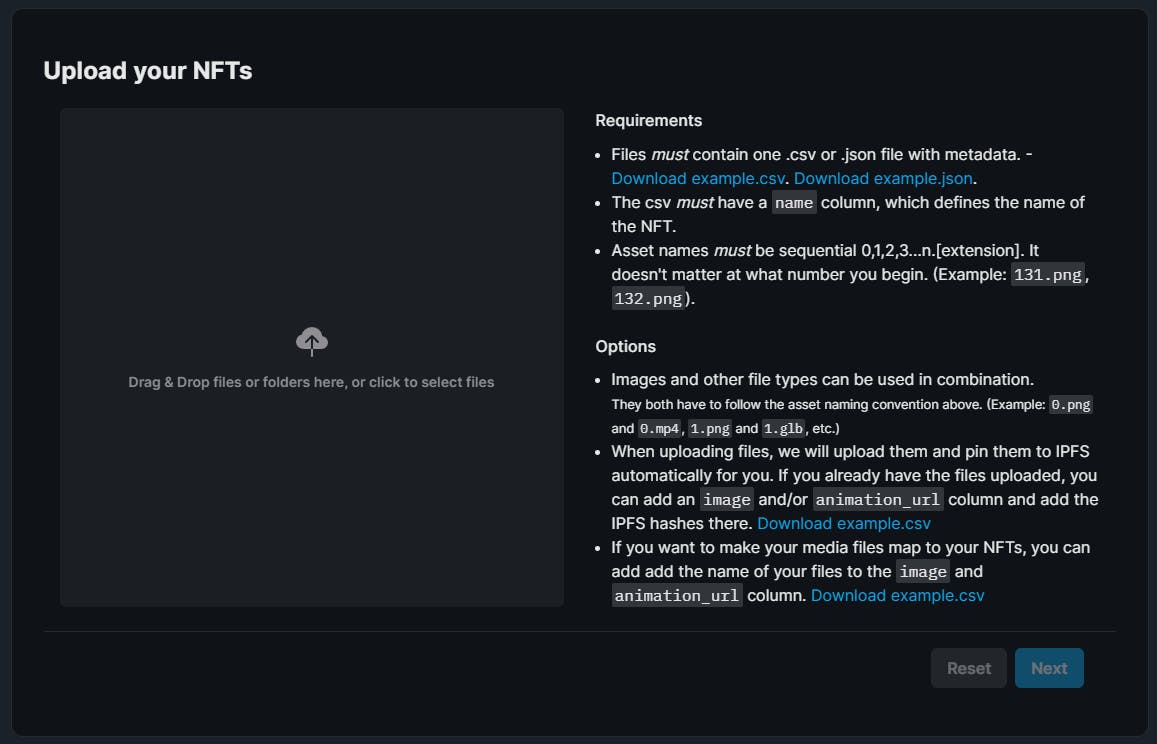
Upload your metadata file along with your images into the drag-n-drop area, and voilà!
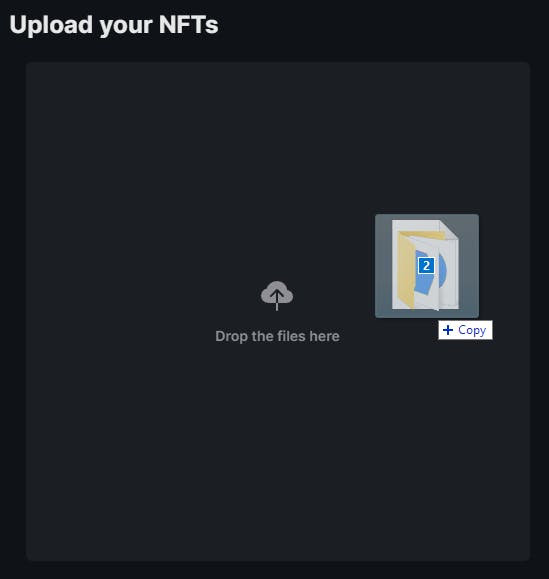
Your NFTs will be ready for you to upload:
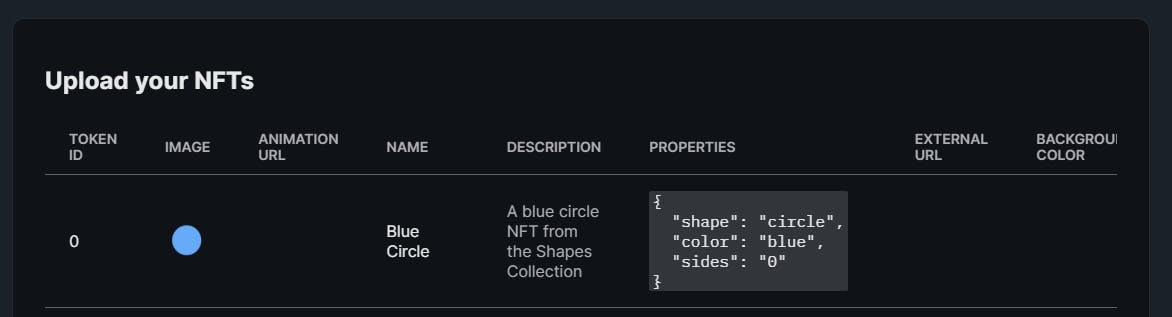
Make sure you're happy with how everything looks, then scroll to the bottom and click Next!
You'll then be given the option to add a Delayed Reveal, which is up to you! For the purpose of this guide, I will choose Reveal upon mint.
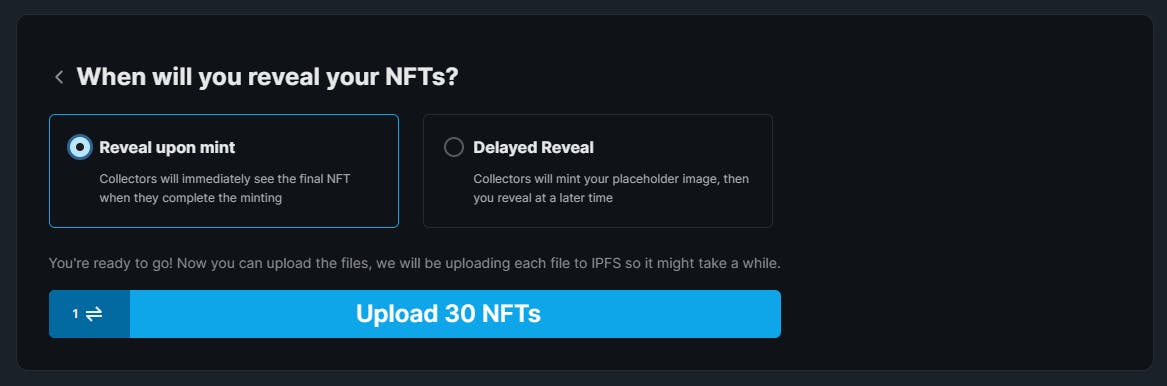
Then I'll hit Upload 30 NFTs!
We're again prompted to approve a transaction, this time the name is a bit more obvious - we're Lazy Minting the NFTs we just uploaded, so I'll click Confirm.
Once the transaction is confirmed, we can see all of our NFTs that we just uploaded in the Overview tab of the NFT Drop.
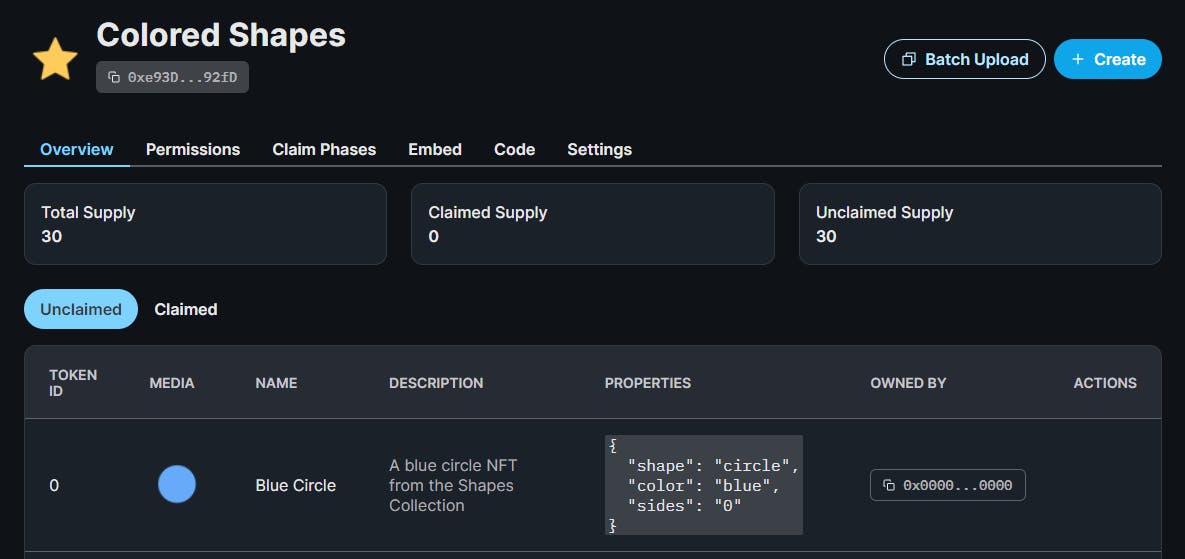
Awesome! Now our users are ready to start minting the NFTs from our collection.
Before we set that up, let's create our very own ERC-20 token too.
Creating the ERC-20 Token
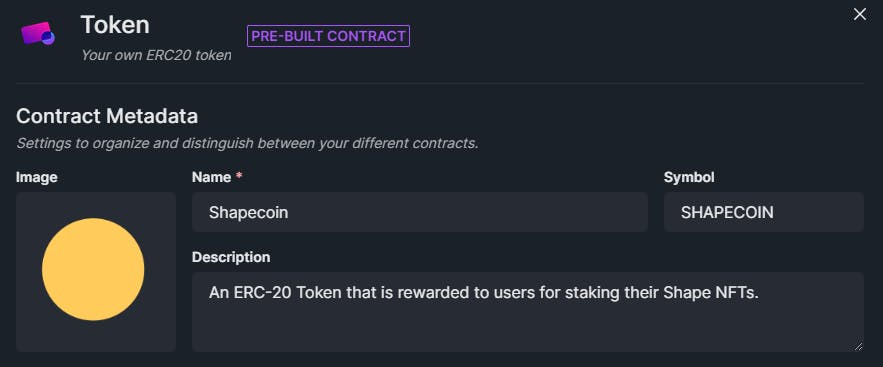
Creating our token is even easier than creating our NFT Drop, we'll follow the same path of clicking Deploy New Contract and Deploy Now, except this time we'll deploy a Token contract rather than an NFT Drop.
I'll configure my Token with these settings, and click Deploy Now, once again deploying onto the Mumbai (MATIC) test network.
Once we've created our token, let's mint the initial supply so that we can reward users later on for staking their NFTs. We can easily do that on the dashboard by clicking the Mint button.
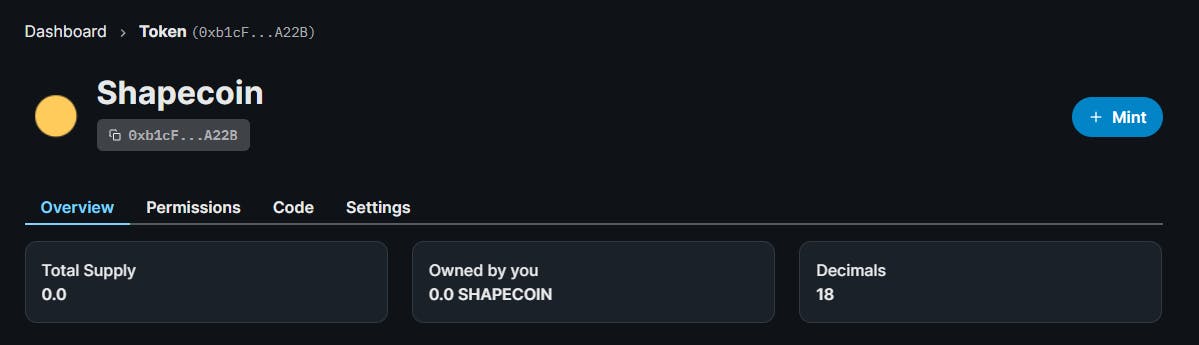
For simplicity, I'll initially create 100 of these tokens by clicking Mint Tokens, and approve the Mint To transaction in MetaMask.
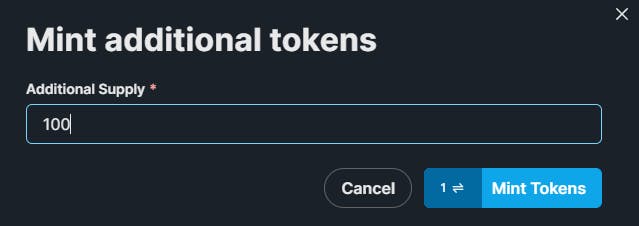
Great! Now we have 100 tokens! In the next step, we'll be able to transfer these to our staking smart contract so that they can be sent out as rewards by the contract.

Let's build our Staking smart contract now!
Building the Staking Contract
The purpose of our staking contract is to store users' NFTs from our NFT Drop contract and reward them with tokens from our token contract.
The longer the user stakes their NFT, the more tokens they will be rewarded.
To give credit where it's due, most of this code for this staking contract comes from this repo:
But we'll go through step by step how to build and understand the functions of this contract, and add thirdweb deploy to the contract so that we can:
- Configure and deploy it via the thirdweb dashboard
- Generate TypeScript functions to interact with our contract
- Use the thirdweb React and TypeScript SDKs to easily use the contract & the blockchain.
Creating the Project
For this guide, I'll be using Next.js & TypeScript to set up the project, and we'll create the smart contract directly in the project for simplicity.
Feel free to use the tools you're comfortable with, or follow along with the steps in this guide to end up with the same result!
Initializing the Next.JS Project with thirdweb
To create a new project using Next.JS, TypeScript and thirdweb, we can use thirdweb's create-thirdweb-dapp CLI tool:
npx create-thirdweb-dapp --next --ts
Change directory into the newly cloned repo:
cd .\nft-staking-app\
Now we have a basic example of Next.JS + thirdweb + Typescript setup, where we can connect, disconnect, and view our MetaMask wallet on the homepage, using thirdweb's helpful hooks.
Writing The Staking Contract
We'll be using some of the [OpenZeppelin contracts] inside of our contract, so we'll need to install the @openzeppelin/contracts package into our project:
npm install @openzeppelin/contracts
To begin with, let's create a new file at the root of our project called StakingContract.sol, which is a Solidity file.
If you're new to Solidity, I'd recommend you install an Extension that provides syntax highlighting such as this one called solidity to make it a lot easier to read.
Let's define our license, imports, and contract in this file:
// SPDX-License-Identifier: MIT
pragma solidity ^0.8.4;

import "@openzeppelin/contracts/token/ERC20/IERC20.sol";
import "@openzeppelin/contracts/token/ERC20/utils/SafeERC20.sol";
import "@openzeppelin/contracts/token/ERC721/IERC721.sol";
import "@openzeppelin/contracts/security/ReentrancyGuard.sol";

contract ERC721Staking is ReentrancyGuard {

}
Now let's walk through how the staking contract is structured, and write it together step by step!
Firstly, let's make some variables for where we're going to store the contract address of the NFT Collection and Token that we created previously:
// We do this so we can use the safeTransfer function
using SafeERC20 for IERC20;

// Interfaces for ERC20 and ERC721
IERC20 public immutable rewardsToken;
IERC721 public immutable nftCollection;
We can use a struct to store information about a staked token:
    struct StakedToken {
        address staker;
        uint256 tokenId;
    }
Now let's make a struct called Staker, which represents the information we need about a wallet that is going to stake its NFTs on our contract:
    // Staker info
    struct Staker {
        // Amount of tokens staked by the staker
        uint256 amountStaked;

        // Staked token ids
        StakedToken[] stakedTokens;

        // Last time of the rewards were calculated for this user
        uint256 timeOfLastUpdate;

        // Calculated, but unclaimed rewards for the User. The rewards are
        // calculated each time the user writes to the Smart Contract
        uint256 unclaimedRewards;
    }
Next up, we'll configure how many tokens we want to reward per hour the NFT has been staked:
    // Rewards per hour per token deposited in wei.
    uint256 private rewardsPerHour = 100000;
Some mappings to store knowledge of:
- Wallet address to
Staker(so we know which wallet is which staker) - Token ID to wallet address (so we know which NFT is staked by which wallet)
    // Mapping of User Address to Staker info
    mapping(address => Staker) public stakers;

    // Mapping of Token Id to staker. Made for the SC to remeber
    // who to send back the ERC721 Token to.
    mapping(uint256 => address) public stakerAddress;
The constructor, which allows us to set the value of the NFT Collection contract address and the token contract address when we deploy the contract (we'll do this on the thirdweb dashboard);
    // Constructor function to set the rewards token and the NFT collection addresses
    constructor(IERC721 _nftCollection, IERC20 _rewardsToken) {
        nftCollection = _nftCollection;
        rewardsToken = _rewardsToken;
    }
Now to the functions!
First up, is a function that allows the user to stake their NFT.
This function also needs to store knowledge of which wallet address is staking which token IDs in the mappings we created:
    // If address already has ERC721 Token/s staked, calculate the rewards.
    // Increment the amountStaked and map msg.sender to the Token Id of the staked
    // Token to later send back on withdrawal. Finally give timeOfLastUpdate the
    // value of now.
    function stake(uint256 _tokenId) external nonReentrant {
        // If wallet has tokens staked, calculate the rewards before adding the new token
        if (stakers[msg.sender].amountStaked > 0) {
            uint256 rewards = calculateRewards(msg.sender);
            stakers[msg.sender].unclaimedRewards += rewards;
        }

        // Wallet must own the token they are trying to stake
        require(
            nftCollection.ownerOf(_tokenId) == msg.sender,
            "You don't own this token!"
        );

        // Transfer the token from the wallet to the Smart contract
        nftCollection.transferFrom(msg.sender, address(this), _tokenId);

        // Create StakedToken
        StakedToken memory stakedToken = StakedToken(msg.sender, _tokenId);

        // Add the token to the stakedTokens array
        stakers[msg.sender].stakedTokens.push(stakedToken);

        // Increment the amount staked for this wallet
        stakers[msg.sender].amountStaked++;

        // Update the mapping of the tokenId to the staker's address
        stakerAddress[_tokenId] = msg.sender;

        // Update the timeOfLastUpdate for the staker
        stakers[msg.sender].timeOfLastUpdate = block.timestamp;
    }
A function that allows the user to withdraw the NFTs they have staked:
    // Check if user has any ERC721 Tokens Staked and if they tried to withdraw,
    // calculate the rewards and store them in the unclaimedRewards
    // decrement the amountStaked of the user and transfer the ERC721 token back to them
    function withdraw(uint256 _tokenId) external nonReentrant {
        // Make sure the user has at least one token staked before withdrawing
        require(
            stakers[msg.sender].amountStaked > 0,
            "You have no tokens staked"
        );

        // Wallet must own the token they are trying to withdraw
        require(stakerAddress[_tokenId] == msg.sender, "You don't own this token!");

        // Update the rewards for this user, as the amount of rewards decreases with less tokens.
        uint256 rewards = calculateRewards(msg.sender);
        stakers[msg.sender].unclaimedRewards += rewards;

        // Find the index of this token id in the stakedTokens array
        uint256 index = 0;
        for (uint256 i = 0; i < stakers[msg.sender].stakedTokens.length; i++) {
            if (stakers[msg.sender].stakedTokens[i].tokenId == _tokenId
                &&
                stakers[msg.sender].stakedTokens[i].staker != address(0)
            ) {
                index = i;
                break;
            }
        }

        // Set this token's .staker to be address 0 to mark it as no longer staked
        stakers[msg.sender].stakedTokens[index].staker = address(0);

        // Decrement the amount staked for this wallet
        stakers[msg.sender].amountStaked--;

        // Update the mapping of the tokenId to the be address(0) to indicate that the token is no longer staked
        stakerAddress[_tokenId] = address(0);

        // Transfer the token back to the withdrawer
        nftCollection.transferFrom(address(this), msg.sender, _tokenId);

        // Update the timeOfLastUpdate for the withdrawer
        stakers[msg.sender].timeOfLastUpdate = block.timestamp;
    }
Finally, we have a function for the user to claimRewards so that they can be rewarded with the tokens we created for staking their NFT:
    // Calculate rewards for the msg.sender, check if there are any rewards
    // claim, set unclaimedRewards to 0 and transfer the ERC20 Reward token
    // to the user.
    function claimRewards() external {
        uint256 rewards = calculateRewards(msg.sender) +
            stakers[msg.sender].unclaimedRewards;
        require(rewards > 0, "You have no rewards to claim");
        stakers[msg.sender].timeOfLastUpdate = block.timestamp;
        stakers[msg.sender].unclaimedRewards = 0;
        rewardsToken.safeTransfer(msg.sender, rewards);
    }
These are the core pieces of our contract, but you might have noticed there is a function that we call named calculateRewards.
This function calculates the time that has passed since the contract last checked this Staker's calculated rewards.
This function is internal, meaning it is not accessible by the public, only by other functions within this smart contract.
    // Calculate rewards for param _staker by calculating the time passed
    // since last update in hours and mulitplying it to ERC721 Tokens Staked
    // and rewardsPerHour.
    function calculateRewards(address _staker)
        internal
        view
        returns (uint256 _rewards)
    {
        return (((
            ((block.timestamp - stakers[_staker].timeOfLastUpdate) *
                stakers[_staker].amountStaked)
        ) * rewardsPerHour) / 3600);
    }
Amazing work! That's all the logic of our contract, now we just need to add some views so that we can retrieve that information.
We'll add a view to read the token IDs a user currently has staked:
    function getStakedTokens(address _user) public view returns (StakedToken[] memory) {
        // Check if we know this user
        if (stakers[_user].amountStaked > 0) {
            // Return all the tokens in the stakedToken Array for this user that are not -1
            StakedToken[] memory _stakedTokens = new StakedToken[](stakers[_user].amountStaked);
            uint256 _index = 0;

            for (uint256 j = 0; j < stakers[_user].stakedTokens.length; j++) {
                if (stakers[_user].stakedTokens[j].staker != (address(0))) {
                    _stakedTokens[_index] = stakers[_user].stakedTokens[j];
                    _index++;
                }
            }

            return _stakedTokens;
        }

        // Otherwise, return empty array
        else {
            return new StakedToken[](0);
        }
    }
Another to read the available rewards a user has:
    function availableRewards(address _staker) public view returns (uint256) {
        uint256 rewards = calculateRewards(_staker) +
            stakers[_staker].unclaimedRewards;
        return rewards;
    }
That's it! Now we're ready to upload our contract to the thirdweb dashboard using thirdweb deploy.
Uploading the contract with thirdweb deploy
Now we're ready to upload our contract to thirdweb.
From the command line, let's run:
npx thirdweb deploy
The result you see should look like this:
💎 thirdweb-cli v0.4.53💎

WARN Unable to detect project type, falling back to solc compilation
INFO  Detected thirdweb contracts: "ERC721Staking"
INFO  Project compiled successfully
INFO  Uploading contract data...
INFO  Upload successful
INFO  Open this link to deploy your contracts:

https://thirdweb.com/contracts/deploy?ipfs=<your-ipfs-url-here>
If everything was successful, you can open that URL in your browser, which will take you to a page where you can deploy your contract. No private key is required!
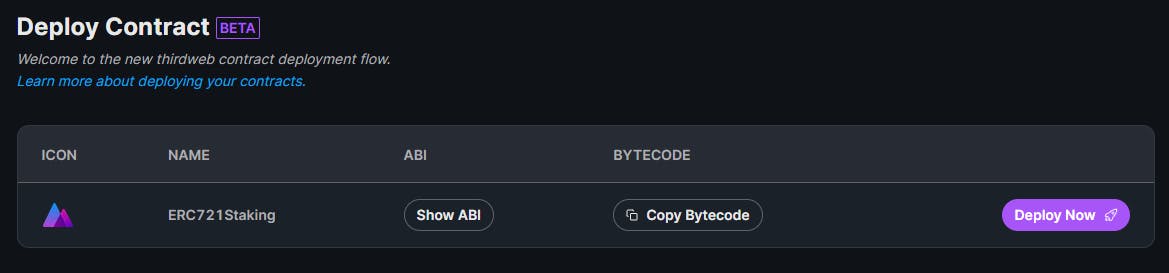
Let's click on Deploy Now and deploy our staking contract onto the Mumbai (MATIC) test network.
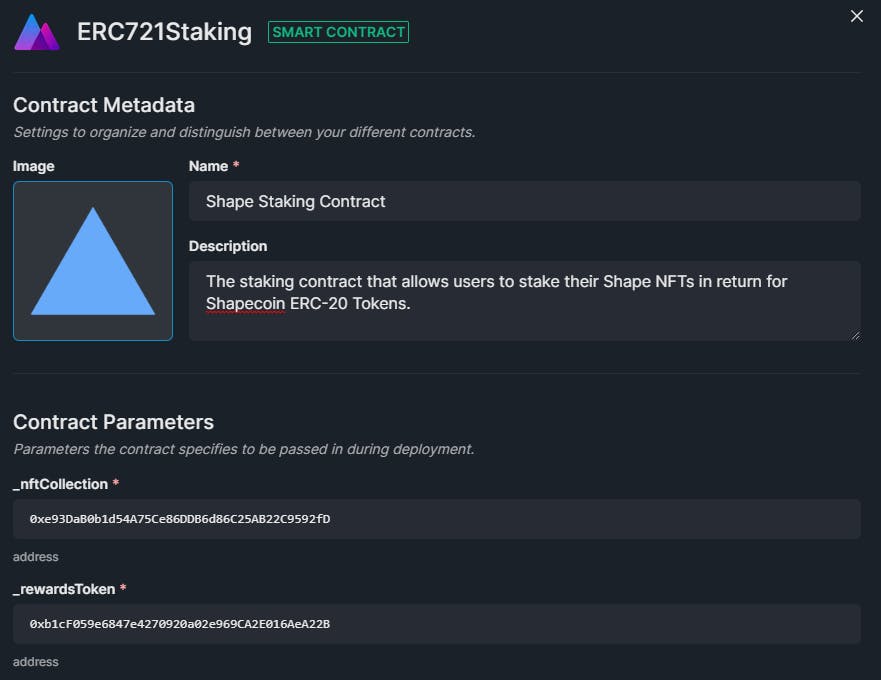
Here, we'll need to populate the required fields we defined in our constructor.
If you go back to the dashboard you can access the contract addresses of your NFT Collection and your Token contracts, and paste them into the contract parameters here:
You've just deployed your very own custom smart contract with the click of a few buttons!
Let's see how we can integrate it into our application now!
Our Generated SDK
If you take a look at the Code tab now on the thirdweb dashboard, you'll see a fully generated list of functions that we can interact with, just by simply using the thirdweb SDK!
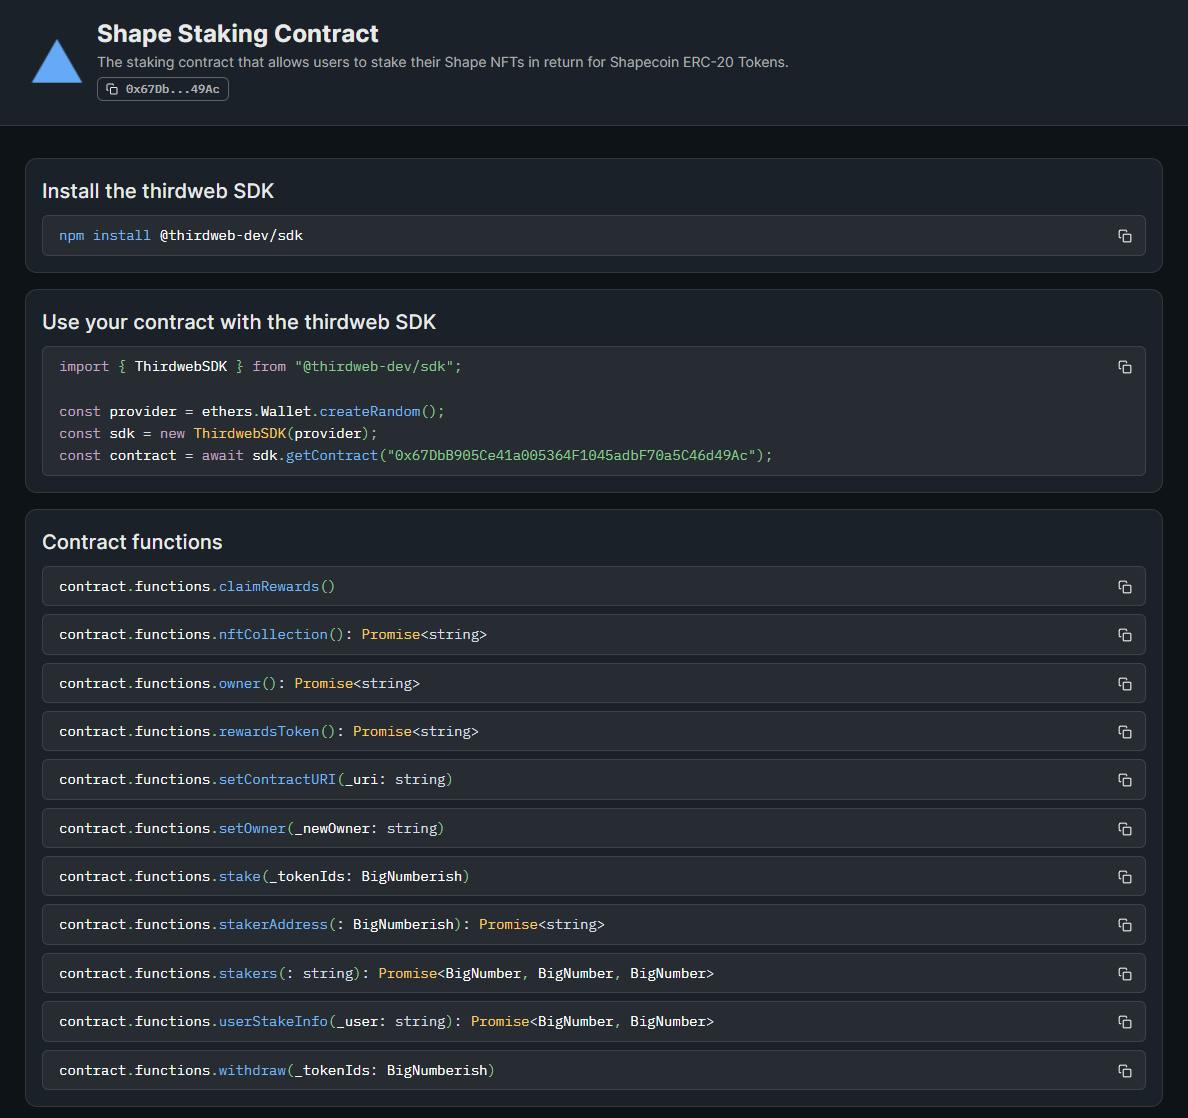
You can see all of the functions we wrote like stake, withdraw, and claimRewards.
The best part is, we don't have to use any other tools to interact with our smart contract, we can just use TypeScript! The thirdweb SDK's handle the rest.
Now let's build out the front-end of this application, so our users can claim and stake their NFTs, and start earning rewards!
Creating the front-end application
In this guide, I'll be using CSS modules to style the app, if you want to use the same styles as I am, feel free to create a file in styles/Home.module.css and styles/globals.css and use the files provided in this example repository.
Remember to import these files wherever necessary.
To begin with, lets head to _app.tsx and configure the activeChainId to be set to ChainId.Mumbai;, like so:
const activeChainId = ChainId.Mumbai;
Then let's head over to our homepage at index.tsx, and create a simple page where users can navigate to two different pages:
- The
/mintroute, where they can use our NFT Collection contract to mint one of our lazy minted NFTs from the collection. - The
/stakeroute, where they can view which NFTs they own from this collection, stake their NFT onto the contract, and claim their rewards.
Here's how the code looks for this, with styling removed for simplicity:
import { useRouter } from "next/router";
const Home = () => {
const router = useRouter();
return (
<div>
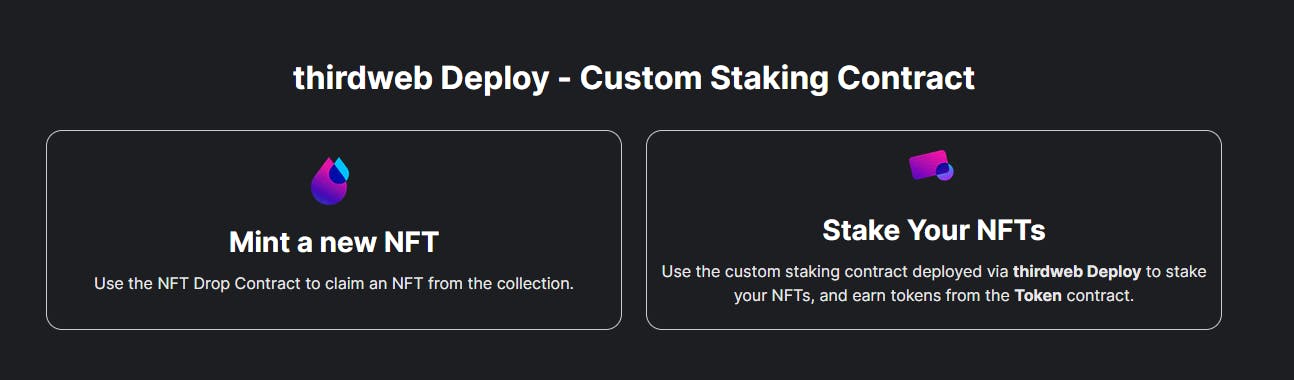
<h1>thirdweb Deploy - Custom Staking Contract</h1>
<div onClick={() => router.push(`/mint`)}>
<h2>Mint a new NFT</h2>
<p>
Use the NFT Drop Contract to claim an NFT from the collection.
</p>
</div>
<div onClick={() => router.push(`/stake`)}>
<img src={`/icons/token.webp`} alt="drop" />
<h2>Stake Your NFTs</h2>
<p>
Use the custom staking contract deployed via <b>thirdweb Deploy</b>{" "}
to stake your NFTs, and earn tokens from the <b>Token</b> contract.
</p>
</div>
</div>
);
};
export default Home;
With some added styling and images, here's how it looks:
Now we'll need to create these pages. In your pages folder, create two new files called mint.tsx and stake.tsx, these will be separate routes where we can handle the logic for minting and staking.
Mint Page
The mint page will show the user a button where they can claim the next available NFT in our NFT Drop. Since we lazy minted these NFTs, the user will be the one who mints the NFT and pay the gas fee for minting.
Let's walk through the pieces of this claiming page now!
First up, let's create a functional component and import the necessary parts of the SDK to make this work:
import { useAddress, useMetamask, useNFTDrop } from "@thirdweb-dev/react";
import { useRouter } from "next/router";

const Mint = () => {
  const router = useRouter();

  return (
    <div>
    </div>
  );
};

export default Mint;
Then, let's import the helpful hooks from the @thirdweb-dev/react package:
  // Get the currently connected wallet's address
  const address = useAddress();

  // Function to connect to the user's Metamask wallet
  const connectWithMetamask = useMetamask();

  // Get the NFT Collection contract
  const nftDropContract = useNFTDrop(
    "<your-NFT-Drop-contract-address-here"
  );
Now we have our NFT Drop contract stored in our nftDropContract variable, just by using one line of code! How cool is that!
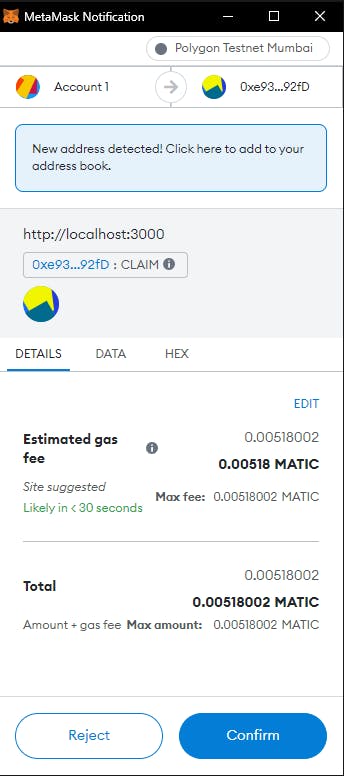
We'll need a function to allow users to claim an NFT from our collection. This function will show an alert when the claim is successful, or if something goes wrong inside the catch block. Once the user closes the successful alert, we'll navigate them to the /stake route so they can stake their NFT if they choose to!
  async function claimNft() {
    try {
      const tx = await nftDropContract?.claim(1);
      console.log(tx);
      alert("NFT Claimed!");
      router.push(`/stake`);
    } catch (error) {
      console.error(error);
      alert(error);
    }
  }
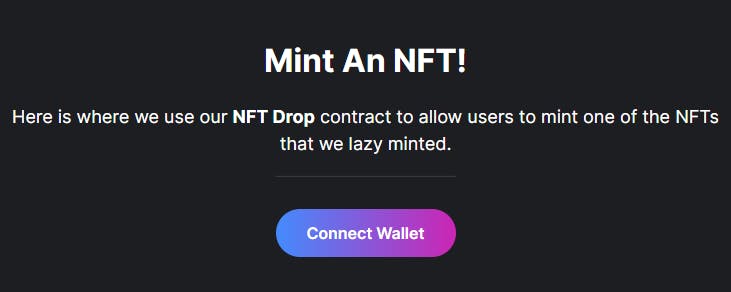
Now for the UI! We'll need to ensure the user is connected to the site with their wallet before they mint; otherwise the function won't work because there is no connected wallet.
To do this, we'll use a ternary operator to show a Connect Wallet button if there is no connected wallet (using address), or show a Claim An NFT button if there is a connected wallet:
    <>
      {!address ? (
        <button onClick={connectWithMetamask}
        >
          Connect Wallet
        </button>
      ) : (
          <button onClick={() => claimNft()}>
            Claim An NFT
          </button>
      )}
    </div>
Great! Now with some added styling, we can see both the Connect Wallet view:
And the Claim An NFT view:
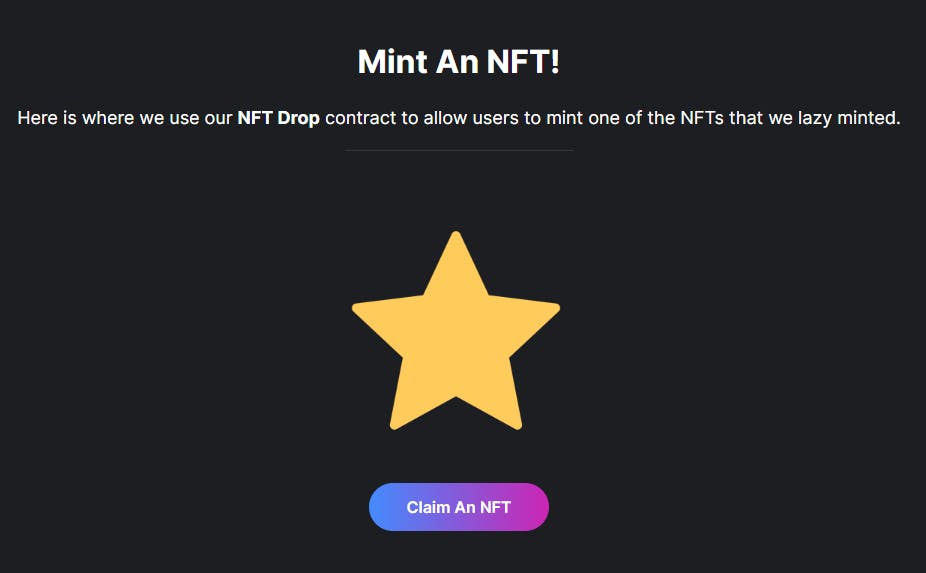
When we click Connect Wallet, we'll be prompted to connect our MetaMask wallet with this website, and then be able to claim an NFT, and taken to the /stake route after approving the claim transaction.
Now we're on the /stake route, let's code this part up!
Stake Page
The stake page is going to have three sections:
- Information about the
Token - Staked NFTs
- Unstaked NFTs
Let's firstly import all of the required functionality for this page:
import {
  ThirdwebNftMedia,
  useAddress,
  useMetamask,
  useNFTDrop,
  useToken,
  useTokenBalance,
  useOwnedNFTs,
  useContract,
} from "@thirdweb-dev/react";
import { BigNumber, ethers } from "ethers";
import type { NextPage } from "next";
import { useEffect, useState } from "react";
import styles from "../styles/Home.module.css";
And we'll create some variables for our contract addresses so we can easily access them throughout this file:
const nftDropContractAddress = "<your-nft-drop-contract-address>";
const tokenContractAddress = "<your-token-contract-address>";
const stakingContractAddress = "<your-staking-contract-address>";
Now let's create the same structure using useAddress and useMetamask to ensure the user has their wallet connected before we attempt to fetch any information:
const Stake: NextPage = () => {
  // Wallet Connection Hooks
  const address = useAddress();
  const connectWithMetamask = useMetamask();
Connect to all of our contracts:
  // Contract Hooks
  const nftDropContract = useNFTDrop(nftDropContractAddress);
  const tokenContract = useToken(tokenContractAddress);
  const { contract, isLoading } = useContract(stakingContractAddress);
Utilise some helpful hooks to load the :
- Balance this user has of this token
- The NFTs they have from this NFT collection:
  // Load Balance of Token
  const { data: tokenBalance } = useTokenBalance(tokenContract, address);

  // Load Unstaked NFTs
  const { data: ownedNfts } = useOwnedNFTs(nftDropContract, address);
You'll notice that we use the .call function to call any of the functions we wrote on the custom contract.
Load this user's staked NFTs if there is a connected wallet:
const [stakedNfts, setStakedNfts] = useState<any[]>([]);

useEffect(() => {
    if (!contract) return;

    async function loadStakedNfts() {
      const stakedTokens = await contract?.call("getStakedTokens", address);

      // For each staked token, fetch metadata for the NFT
      const stakedNfts = await Promise.all(
        stakedTokens?.map(
          async (stakedToken: { staker: string; tokenId: BigNumber }) => {
            const nft = await nftDropContract?.get(stakedToken.tokenId);
            return nft;
          }
        )
      );

      setStakedNfts(stakedNfts);
      console.log("setStakedNfts", stakedNfts);
    }

    if (address) {
      loadStakedNfts();
    }
  }, [address, contract, nftDropContract]);
Load the available rewards for this user, again using .call:
  const [claimableRewards, setClaimableRewards] = useState<BigNumber>();

  useEffect(() => {
    if (!contract || !address) return;

    async function loadClaimableRewards() {
      const cr = await contract?.call("availableRewards", address);
      setClaimableRewards(cr);
    }

    loadClaimableRewards();
  }, [address, contract]);
Stake function call:
In order for the contract to transfer our NFTs, it needs to have the approval to do so.
Inside the stake function, we check to see if the smart contract has approval, and call setApprovalForAll if it doesn't already have the approval to transfer NFTs from this wallet for this collection.
  async function stakeNft(id: BigNumber) {
    if (!address) return;

    const isApproved = await nftDropContract?.isApproved(
      address,
      stakingContractAddress
    );
    // If not approved, request approval
    if (!isApproved) {
      await nftDropContract?.setApprovalForAll(stakingContractAddress, true);
    }
    const stake = await contract?.call("stake", id);
  }
Withdraw function using .call:
  async function withdraw(id: BigNumber) {
    const withdraw = await contract?.call("withdraw", id);
  }
Claim Rewards function using .call:
  async function withdraw(id: BigNumber) {
    const withdraw = await contract?.call("withdraw", id);
  }
Now we can show all of the information we have fetched on the UI!
Loading state:
  if (isLoading) {
    return <div>Loading</div>;
  }
Show a connect wallet button if there is no address:
return (
    <div className={styles.container}>
      <h1 className={styles.h1}>Stake Your NFTs</h1>

      <hr className={`${styles.divider} ${styles.spacerTop}`} />

      {!address ? (
        <button className={styles.mainButton} onClick={connectWithMetamask}>
          Connect Wallet
        </button>
      ) : (
        <>
          // ... next code blocks go here
        </>
      )}
    </div>
  );
Show connected wallet's claimable rewards and token balance
          <h2>Your Tokens</h2>

          <div className={styles.tokenGrid}>
            <div className={styles.tokenItem}>
              <h3 className={styles.tokenLabel}>Claimable Rewards</h3>
              <p className={styles.tokenValue}>
                <b>
                  {!claimableRewards
                    ? "Loading..."
                    : ethers.utils.formatUnits(claimableRewards, 18)}
                </b>{" "}
                {tokenBalance?.symbol}
              </p>
            </div>
            <div className={styles.tokenItem}>
              <h3 className={styles.tokenLabel}>Current Balance</h3>
              <p className={styles.tokenValue}>
                <b>{tokenBalance?.displayValue}</b> {tokenBalance?.symbol}
              </p>
            </div>
          </div>
Button for users to claim their available rewards:
          <button
            className={`${styles.mainButton} ${styles.spacerTop}`}
            onClick={() => claimRewards()}
          >
            Claim Rewards
          </button>
View all of their staked NFTs:
Each mapped div contains a Withdraw button to call the withdraw function and pass in the token ID of this item.
          <h2>Your Staked NFTs</h2>
          <div className={styles.nftBoxGrid}>
            {stakedNfts?.map((nft) => (
              <div className={styles.nftBox} key={nft.metadata.id.toString()}>
                <ThirdwebNftMedia
                  metadata={nft.metadata}
                  className={styles.nftMedia}
                />
                <h3>{nft.metadata.name}</h3>
                <button
                  className={`${styles.mainButton} ${styles.spacerBottom}`}
                  onClick={() => withdraw(nft.metadata.id)}
                >
                  Withdraw
                </button>
              </div>
            ))}
          </div>
View all of their owned NFTs (NFTs from this collection that are not staked in the contract):
Each mapped div contains a button for the user to call the stakeNft function, again passing in the token ID as a parameter.
          <h2>Your Unstaked NFTs</h2>

          <div className={styles.nftBoxGrid}>
            {ownedNfts?.map((nft) => (
              <div className={styles.nftBox} key={nft.metadata.id.toString()}>
                <ThirdwebNftMedia
                  metadata={nft.metadata}
                  className={styles.nftMedia}
                />
                <h3>{nft.metadata.name}</h3>
                <button
                  className={`${styles.mainButton} ${styles.spacerBottom}`}
                  onClick={() => stakeNft(nft.metadata.id)}
                >
                  Stake
                </button>
              </div>
            ))}
          </div>
You will also notice we are utilising the ThirdwebNftMedia component, which renders the media asset of the NFT differently depending on what kind of file type is resolved from the NFT.
That's it! Now users will be able to see any of the NFTs they claimed from the /mint route, click the stake button, and start earning rewards!
Giving the staking contract some funds
One last thing, we'll need to transfer the NFT staking contract some of our tokens so that it can distribute them as rewards.
We can do this via the thirdweb CLI by going to our Token contract, and clicking on the Transfer button:
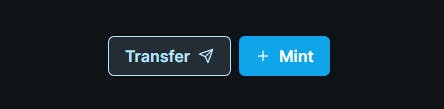
Then paste in your staking contract's address and send it some tokens!
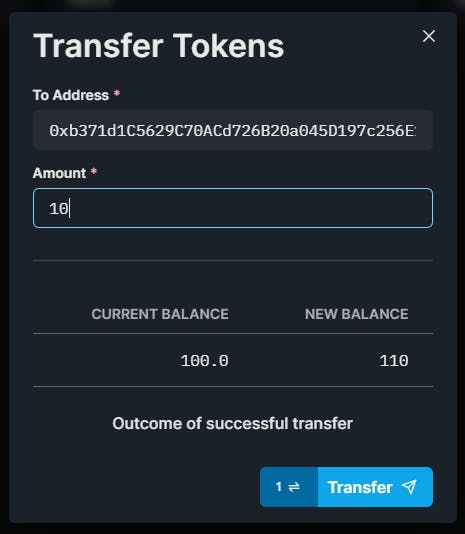
Now it is capable of transferring tokens whenever somebody tries to call the claimRewards function!
🥳🎉
Conclusion
In this guide, we've made three smart contracts and combined them together to create a project that rewards users for holding the NFTs.
We have created all of this:
- ERC-721 NFT Drop contract
- ERC-20 Token contract
- An NFT Staking contract rewarding stakers with ERC-20 tokens
Disclaimer: This staking contract has not been audited and should not be trusted for use in production environments! Please do your own research and use it at your own risk.